The keyboard is really the work horse of any computer system. During its life it takes a real battering from the user. Constant hard pounding with fingers, spilt liquids such as tea, coffee and tears when thing do not go as intended. Body parts such as loose skin, dandruff and other bits. But not forgetting time itself as this is a major factor in the keyboards ageing and failure. This all makes for a keyboard that needs a good overhaul to restore it to near 'new' condition. In this section the keyboard will be fully cleaned and serviced.
Please note there are several differing case styles of keyboard but the methods detailed below are applicable to all.
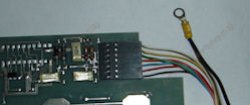
DISMANTLING
Tools need for this job is a crosshead screw driver, a small straight end screwdriver, a container for the removed screws, a soft towel and a firm flat work surface such as a bench or stout table.
Optional tools are a soft paint brush and vacuum cleaner. A useful item is a digital camera to photograph the various parts before dismantling or paper and pencil to make notes and diagrams to aid reassembly.
The first job is to remove as much dirt and dust from the unit as is possible using the brush and vacuum cleaner. Brush out as much dirt etc. from between the keys as is possible using the vacuum cleaner to suck it up. Turn the unit over and tap out any other loose dirt that may have been missed but be gentle.
Remove the screws from the bottom of the unit and lift away the base. Clean it up with a brush to remove any stubborn dirt etc.